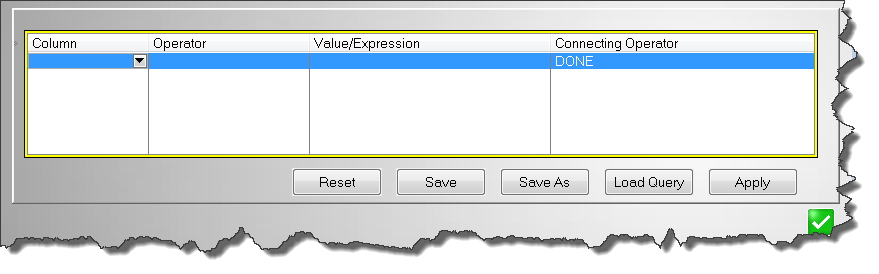
The query center offers a very comprehensive way to filter the displayed data. The query center will appear as the picture above, located just below your data. Double click under each heading to enter the match criteria. You can export the resulting data, sorted and filtered as displayed. See Exporting a Browse Table
Very complex filters can be created using this feature. Once completed, you can save the filter for future use by pressing the SAVE button. Filters are saved on the computer you save them from and do not interfere with filters created by other users. Unfortunately, the trade off is that these filters cannot be shared with other users.
Steps for Creating a filter:
|
1
|
Select the column to filter. Press the drop down arrow and choose the desired column.
|
|
2
|
Choose an Operator. This option is used to control whether items should be equal, less than, greater than, starts with, contains, etc when compared to the Value/Expression
|
|
3
|
Set Value/Expression. Enter the text to match.
|
|
4
|
Connecting Operator. For simple filters, this will simply be set to "done". But you can filter for multiple conditions too. There are many options available. For example you could set the operator to AND to combine more than one expression.
|
|
4
|
Apply. Use the filter you have defined and show matching items.
|
|
5
|
Save As. Give the filter a name and save it for future use.
|
|
6
|
Load Query. Load a filter you have saved previously.
|
|
|
Filter Shortcut: you can drag an item from the displayed list and drop it onto the Query Center to save time and typing.
|
Query Button
|
|
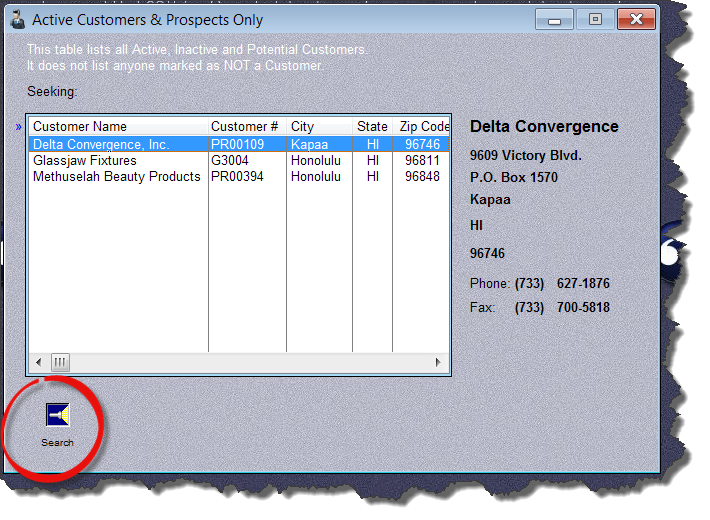
Other times, a simpler, but less comprehensive method of filtering is offered by the Query button. This button is located in the lower left area of a displayed list of items.
|
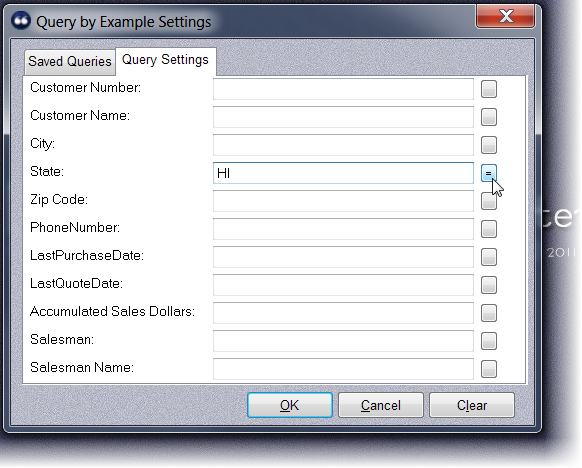
Press the Query button to display the filter form.
Note: The choices offered for filtering depend upon the list being viewed.
Enter the desired match condition in the appropriate field, then click the condition button on the right to cycle through the available search conditions such as equal to (=), greater than (>), greater than or equal to (>=), less than (<), less than or equal to (<=), not equal to (<>) or no filter (blank).
In the example below, we are filtering for customers in the state of Hawaii.
After pressing the OK button, your customer list might look like this:
Note that the search button now shows an illuminated flashlight indicating that a filter has been applied.
After you are satisfied that your search is displaying the items you wanted to see, you can save the filter for later use. To do this, press the Search button again then click on the Saved Queries tab. Give your filter a name and click the Save button.
In the future, when you wish to view items that meet this filter condition, after pressing the search button, double click on one of the previously saved queries in the list.
|
|
The queries you create are saved on your local computer. So each user can create their own set of queries. But since they are on your local machine, if you sign into MasterQ from another computer on your network, your existing queries will not be shown.
|
|