|
General Considerations for Customer Data Import
Each customer record that you import must have a unique customer number assigned by the exporting program. You can read more about creating customer number here: Assigning customer numbers
If your exporting program does not use customer ID numbers, you are not able to import directly into MasterQ.
The customer data CSV file may contain the following information. Only the customer name & number are required, but adding additional information will save time later. Commas must separate each item, even if the item is not included in your export file.
|
Customer number
|
Up to 10 numbers or letters
|
|
Customer name
|
|
|
First address line
|
|
|
Second address line
|
|
|
City
|
|
|
State
|
|
|
Zip or Postal code
|
|
|
Phone area code
|
|
|
Phone number
|
|
|
Fax area code
|
|
|
Fax number
|
|
|
Customer's payment terms
|
|
|
Customer's ship via
|
|
|
Delivery day
|
|
|
Credit Status
|
|
|
Tax ID Number
|
|
A typical line in your import file might look like this:
A1, Bobs Welding,11 First St, Suite B, Livonia, MI, 48154, 313, 5551212, 313, 5551213, NET 30, Our truck, Tuesday, 7777778
If you choose not to include some information, be sure to leave the commas in position. For example, to import Bobs Welding but skipping phone numbers, your line might look like this:
A1, Bobs Welding,11 First St, Suite B, Livonia, MI, 48154, , , , , NET 30, Our truck, Tuesday, 7777778
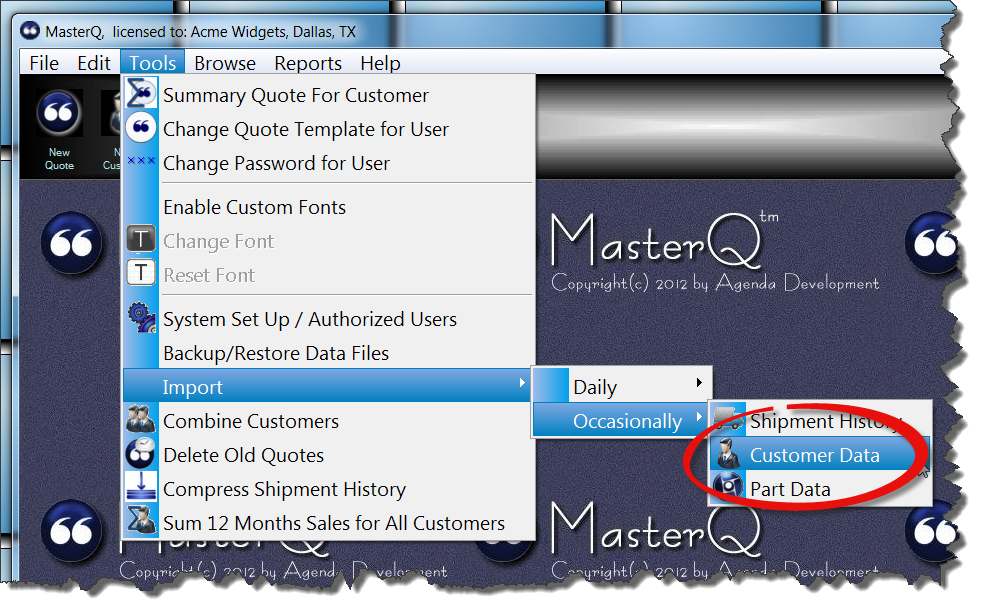
After you choose the Import Customer Data command, you will be asked to confirm which file is being imported:
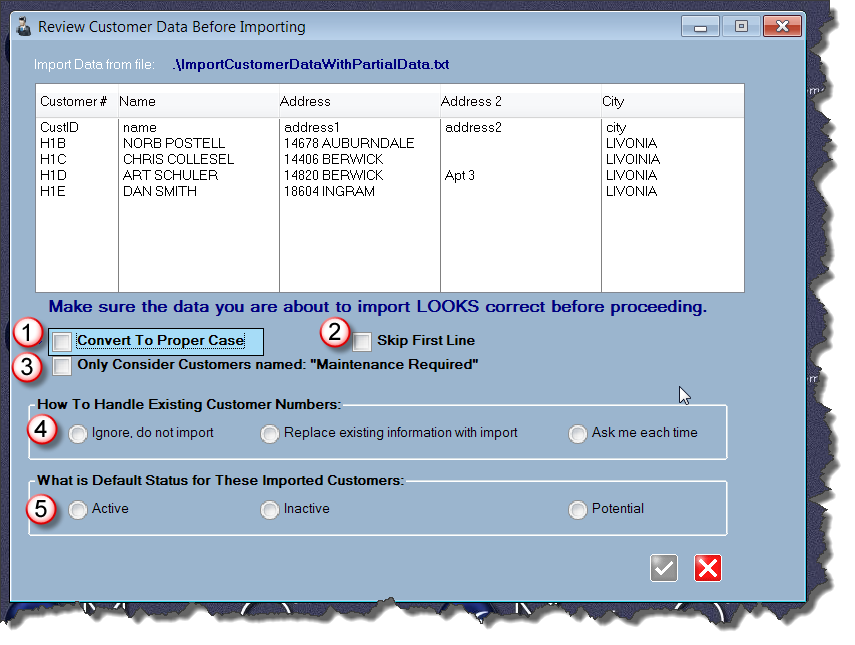
Once you have selected the file containing the data to import, the following confirmation screen will be displayed:
|
|
Convert to Proper Case
Check this box to convert a name like SMITH to Smith automatically.
|
|
|
Skip First Line
If the first line of the import file contains descriptions rather than actual data (like the example pictured above) you can check this box to skip the first line.
|
|
|
Only Consider Customers named "Maintenance Required"
When orders are imported for a customer ID that does not exist in MasterQ, a customer record is created with a customer name of "Maintenance Required". Checking this box will only update these new customers regardless of the other records in the import file.
|
|
|
How To Handle Existing Customer Numbers
If a customer ID number already exists in your customer database you can choose what happens during the import process.
1) Ignore, do not import anything for an existing customer
2) Replace existing information with the data in the import file
3) Ask each time - will present you with the two records and ask you which one should be used.
|
|
|
Customer Status
Each customer has a status of Active, Inactive, Prospect or Not Customer (example, a vendor). You can set the status of these imported customers by selecting an option here.
|
TIP: The OK button is disabled until all options have been set.
|