|
This feature allows you to select a group of people and export their information into a CSV file for use in other programs. This feature is available in MasterQ-ENT.
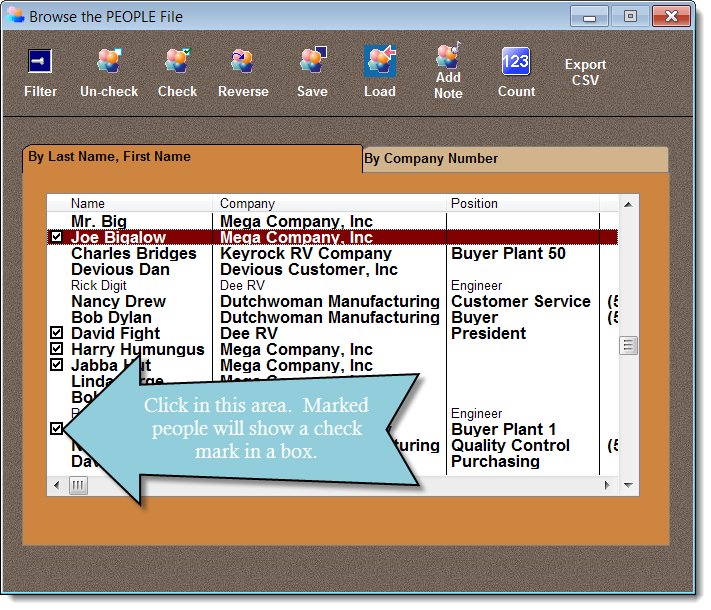
The first step is to identify which contacts you wish to add a note to. This is referred to as "marking" a contact. The most direct way to mark a contact is to click in the people browse in the far left column by the desired person's name.
|
|
|
You may un-mark all displayed people, mark all displayed people, or swap their marked status using the UN-Check, Check & Reverse buttons. These actions apply only to people currently displayed. You can filter the people currently displayed by using the Search button.
|
|
The save and load buttons "remember" your current list of marked customers. When they are loaded, you are given the option of marking, unmarking, or flipping the current status of the customers being loaded.
|
|
|
|
The count button gives a quick count of the number of people you have currently marked and the total number of people in your database.
|
|
|
|
|
|
Pressing the Add Note button will create a note that will be applied to all currently marked people.
More information about Adding Notes to multiple people at one time is available here. |
|
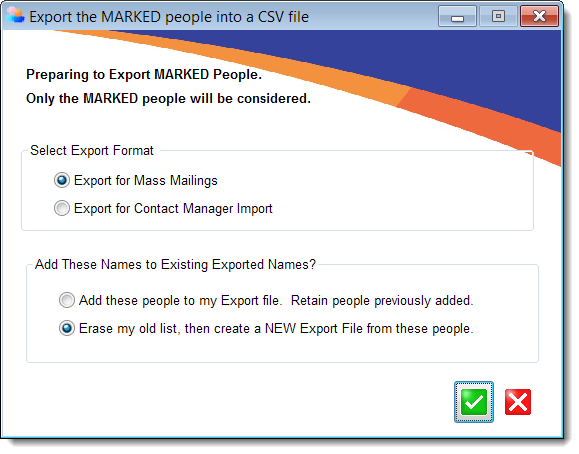
The Export CSV button saves the currently marked people in a CSV (comma separated values). This can be useful for creating mail merge applications.
|
|
|
Choosing Select Export Format of Export for Mass Mailings will create a CSV file containing the following information:
|
|
-
WholeName
-
CompanyName
-
Address1
-
Address2
-
City
-
State
-
Zipcode
|
If you select Export for Contact Manager Import instead, additional information is included:
|
|
-
LastName
-
FirstName
-
CompanyName
-
Address1
-
Address2
-
City
-
State
-
Zip
-
PhoneNumber
-
Fax Number
-
CellNumber
-
eMailAddress
|
You have the option of adding the marked name information to the existing file, or starting over and creating a file that only contains the current set of names.
The information you select is saved in the installed folder in a file named ExPeople.txt
|